How to Contact Your Advisor and Register for Classes
This step-by-step guide walks through how to find your advisor, make contact, and complete class
registration using the included screenshots for each part of the process.
By: Hannah Bryant, Sidney Kelly, Alex Markham, and Britt Reed
Last updated: 4/27/2026 - 1:41 PM
01
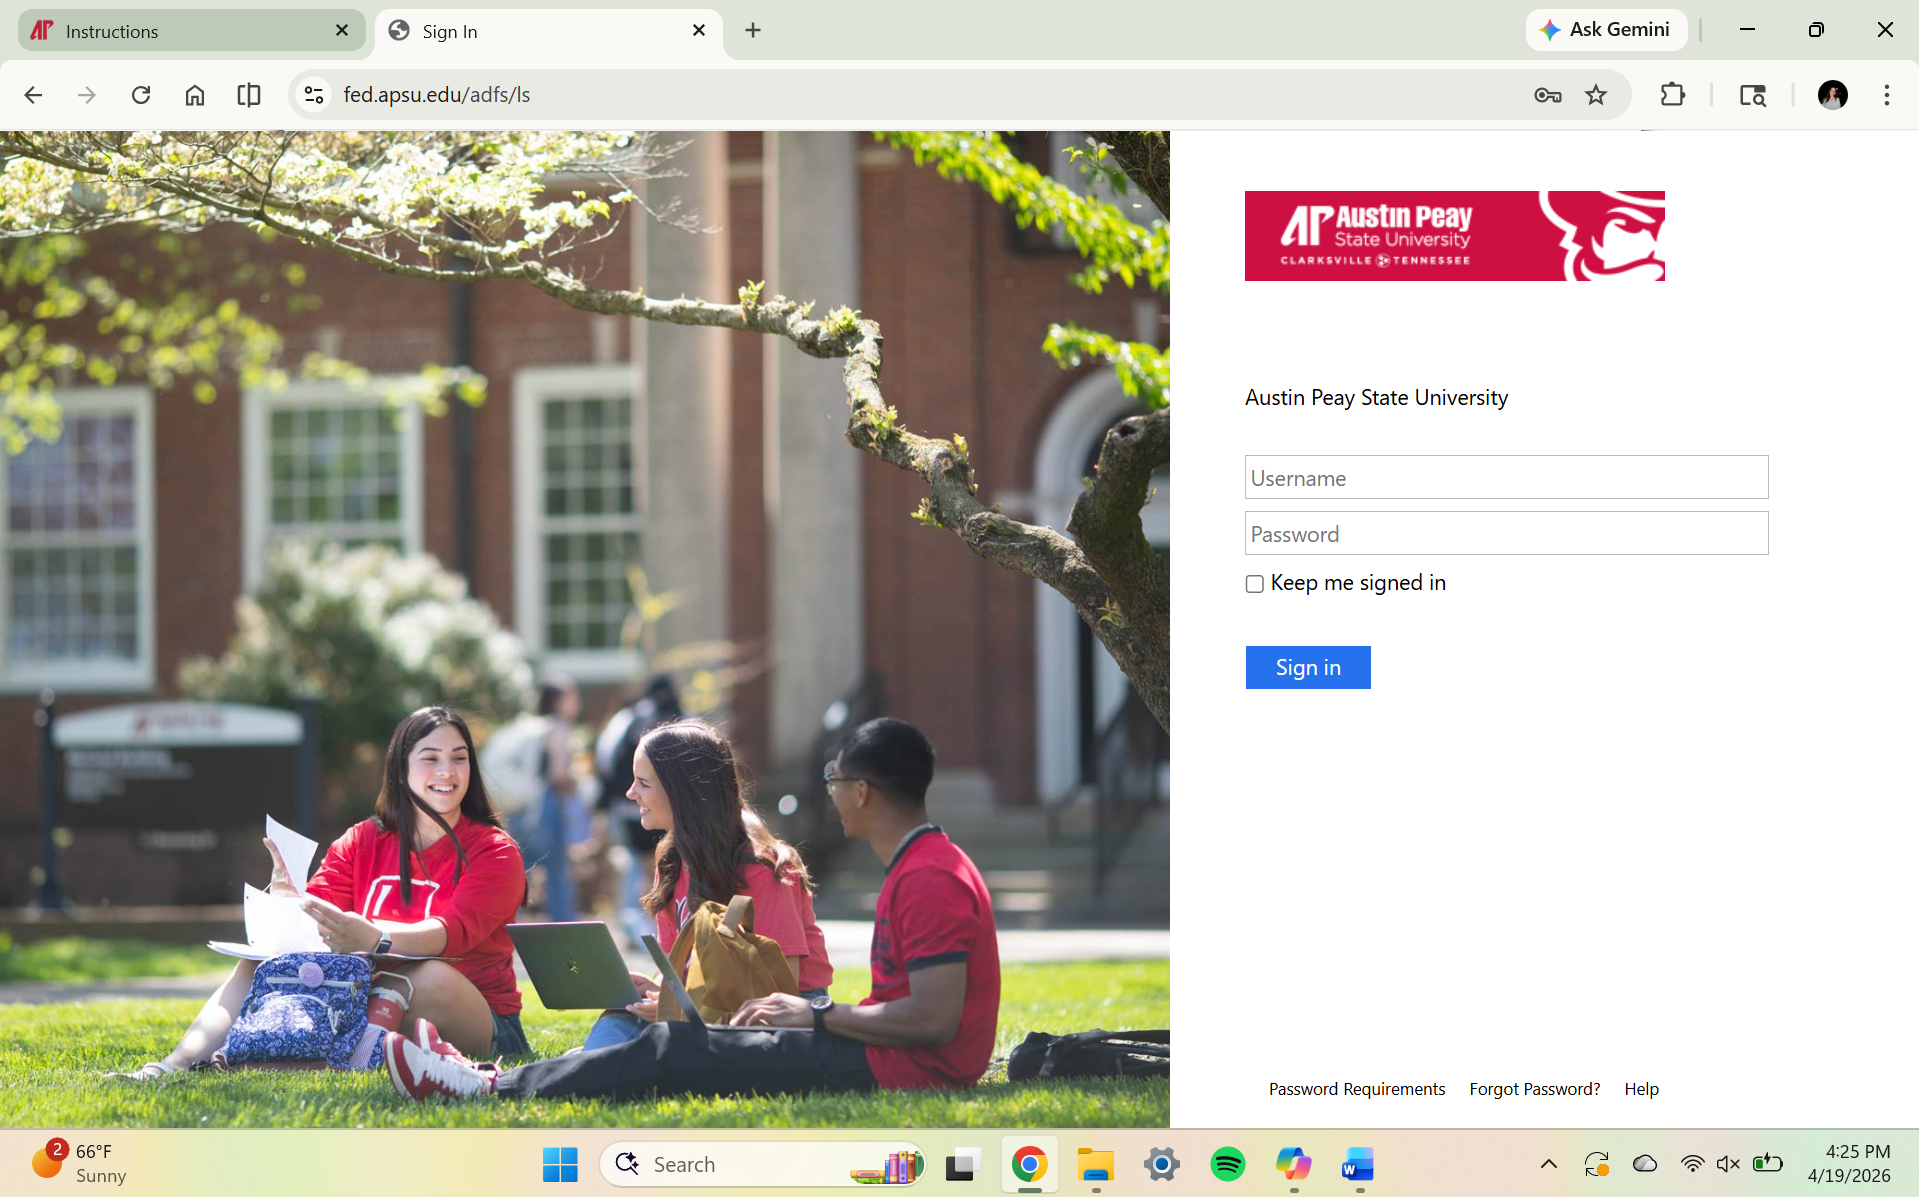
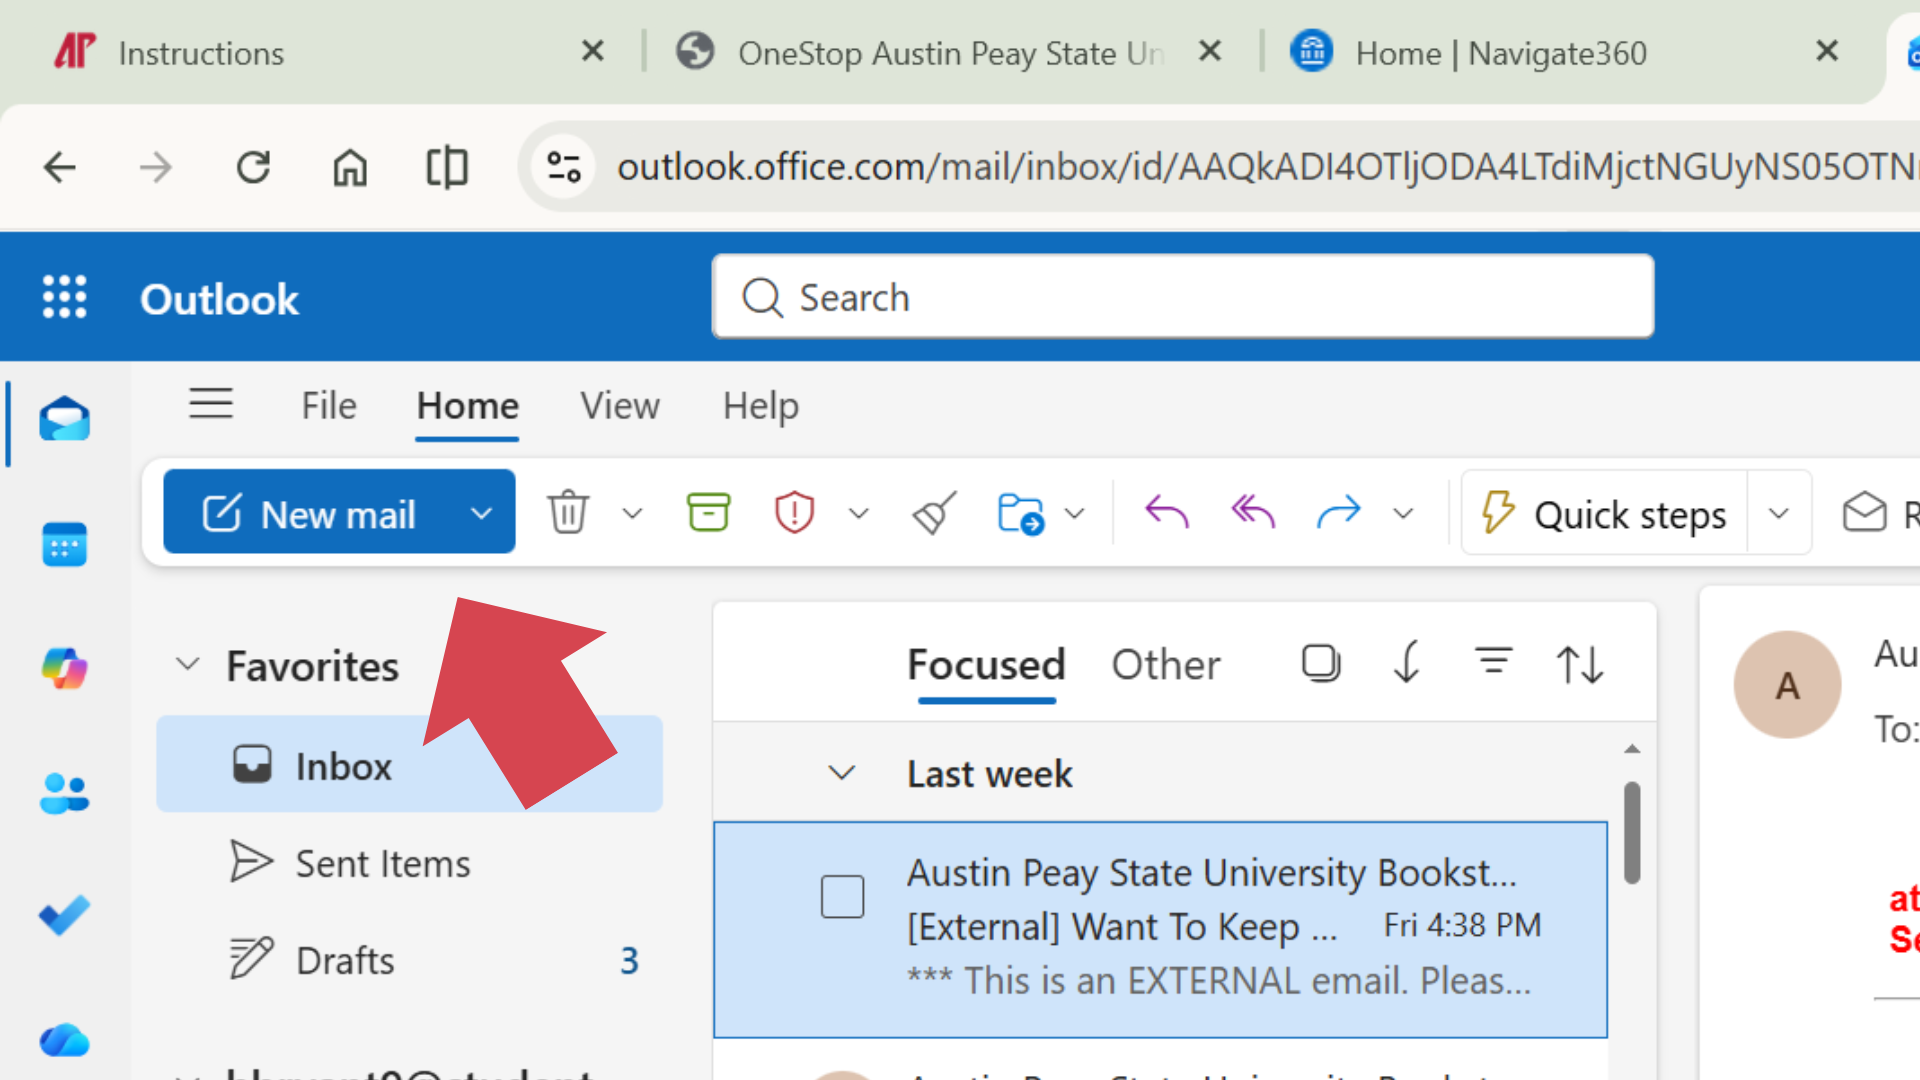
Open the APSU website
Go to the Austin Peay State University homepage (www.apsu.edu) in your web browser to begin the advising and registration process. Click the magnifying glass (🔍) in the top right corner and search "OneStop". Click the top link within the first search result, then "Click here to login".
02
Sign in to your student portal
Click the student login area and enter your APSU username and password to access your student tools.
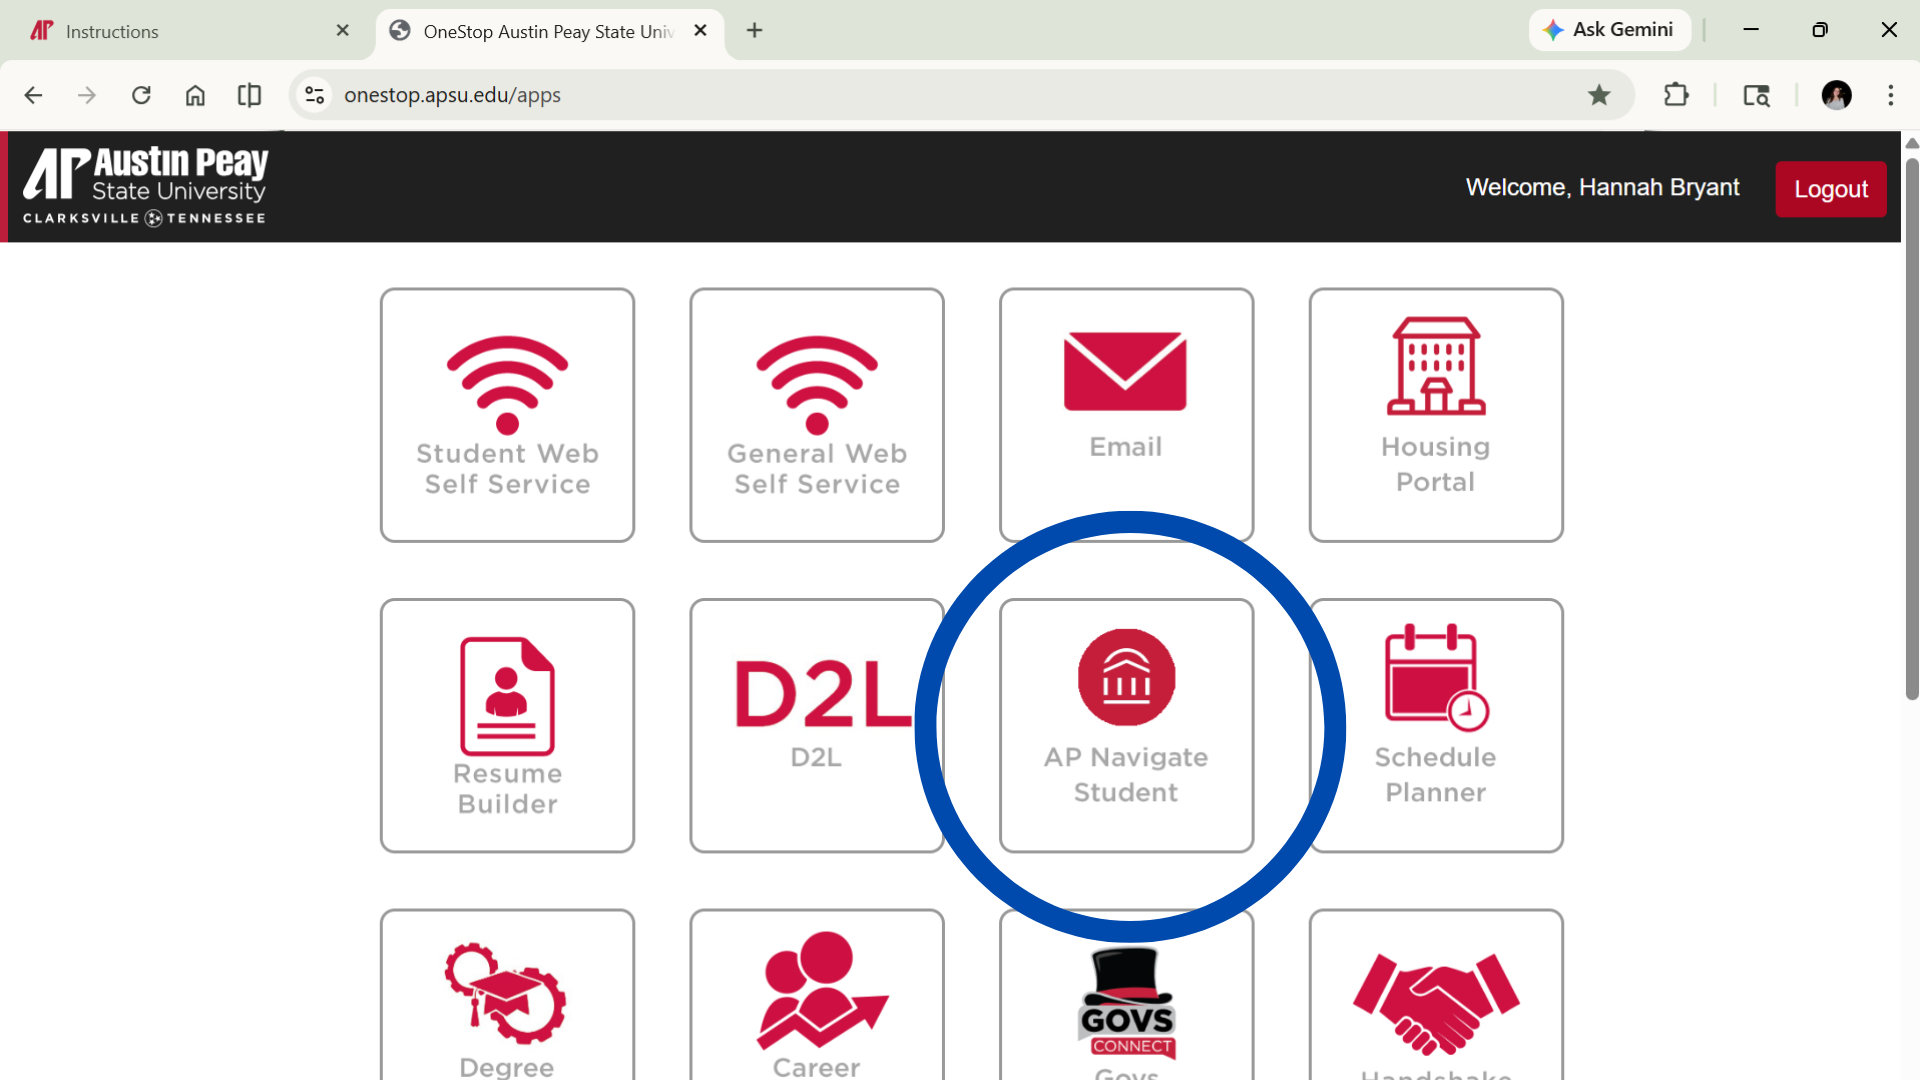
03
Open the advising or student records area
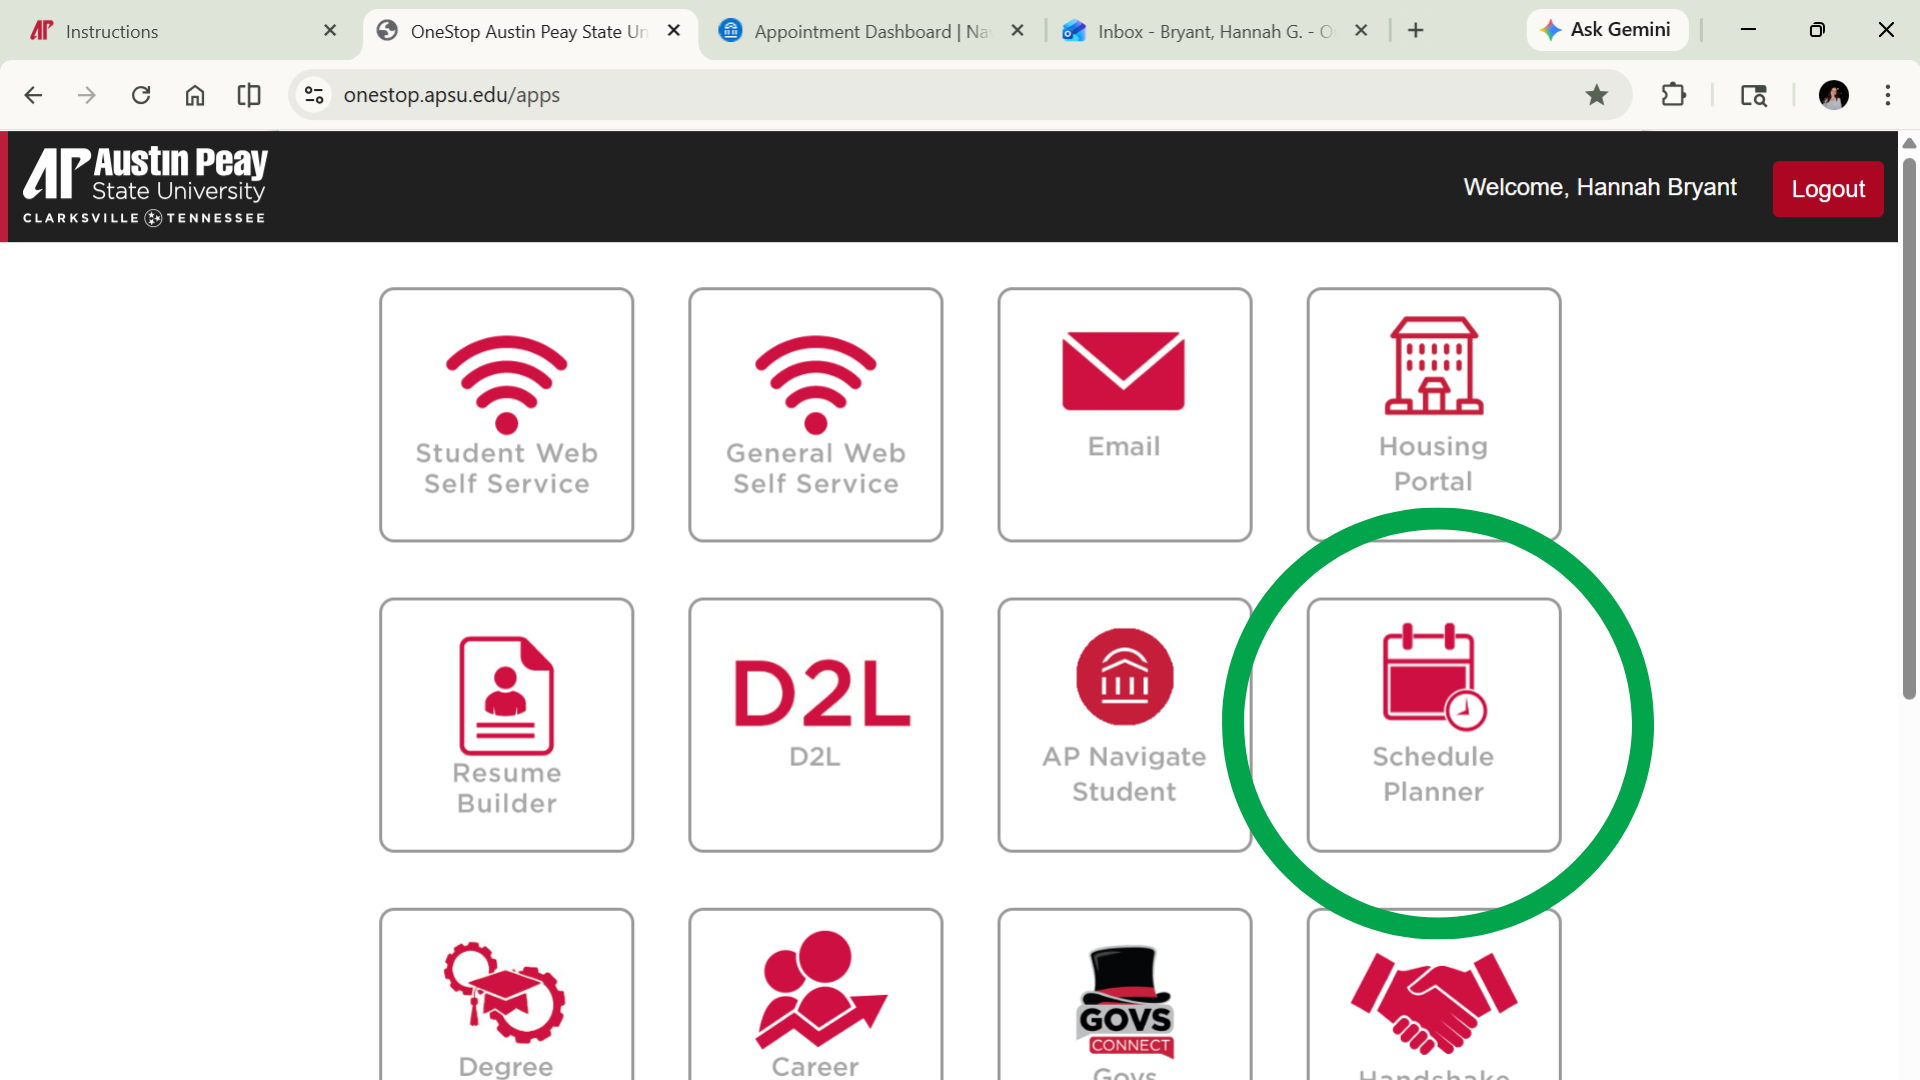
After logging in, navigate to the section that shows your academic information (AP Navigate Student), advising details, or registration tools.
04
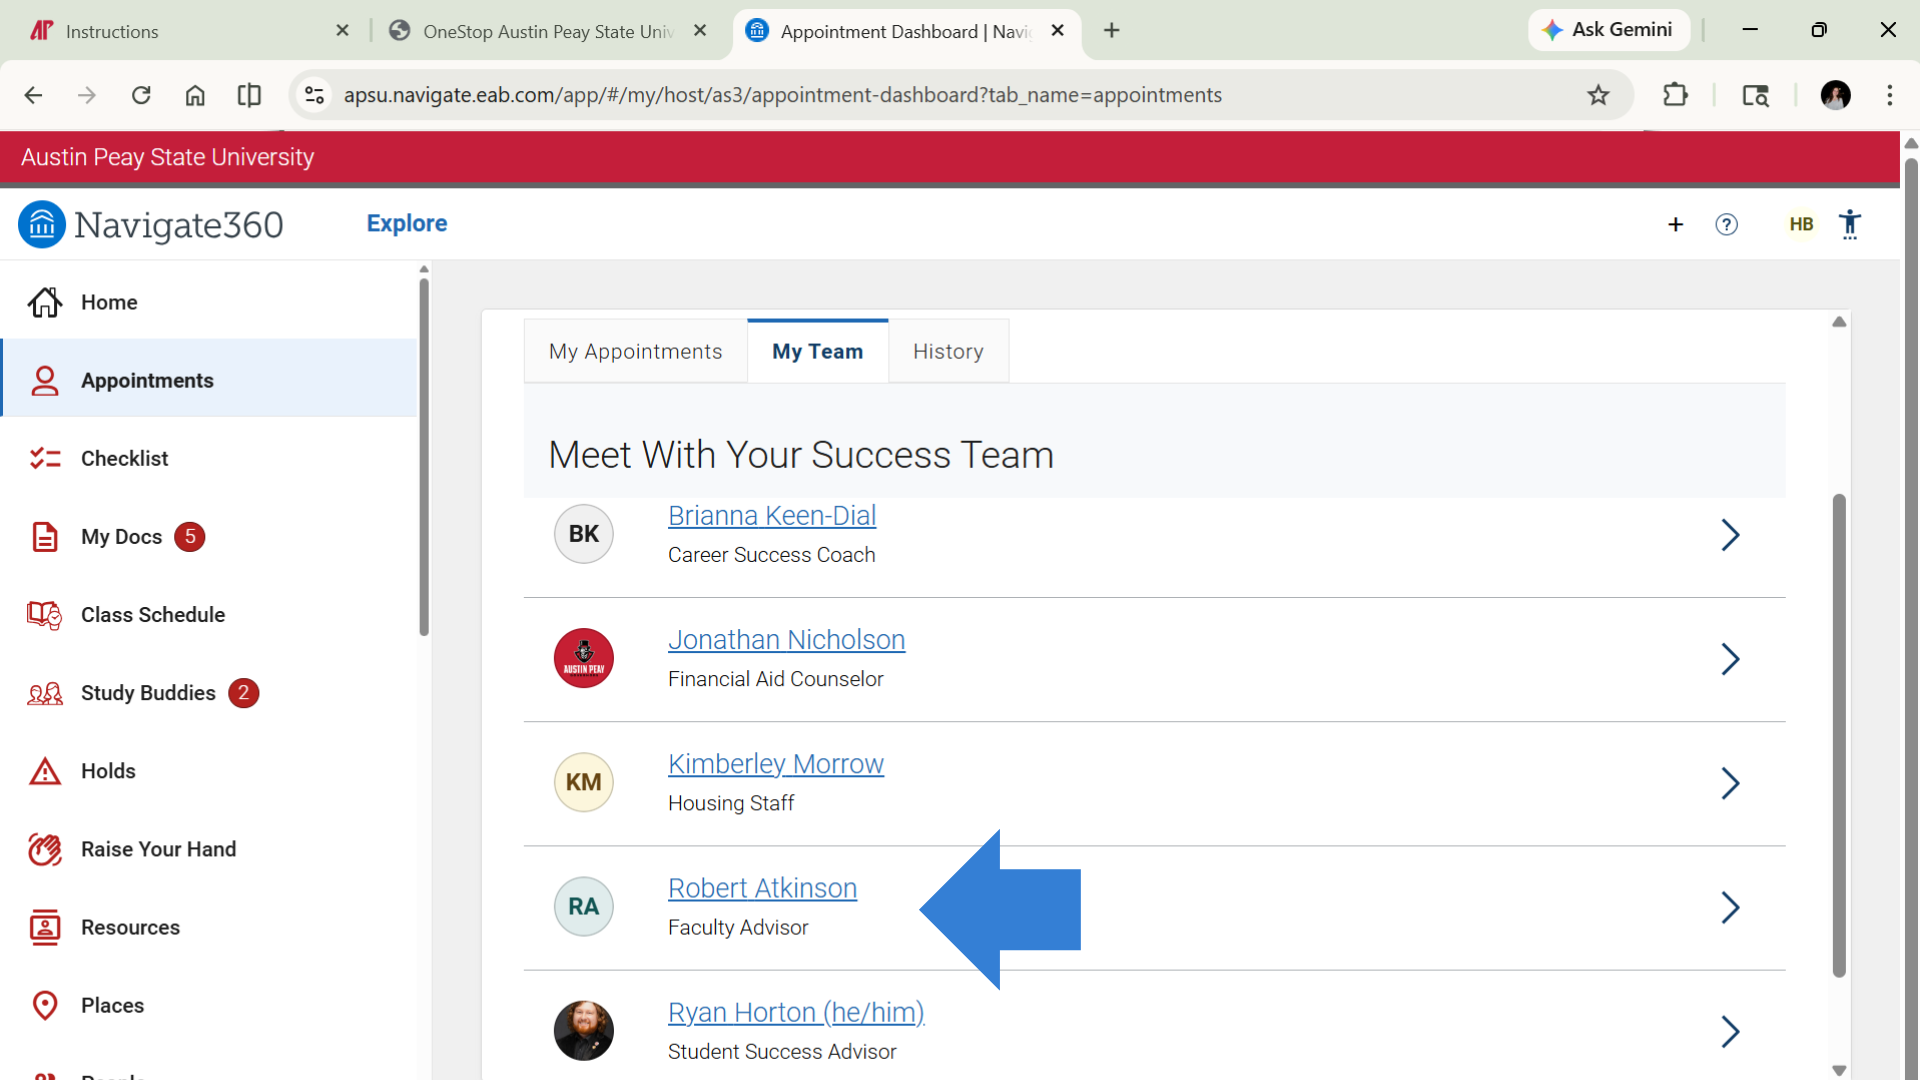
Locate your assigned academic advisor
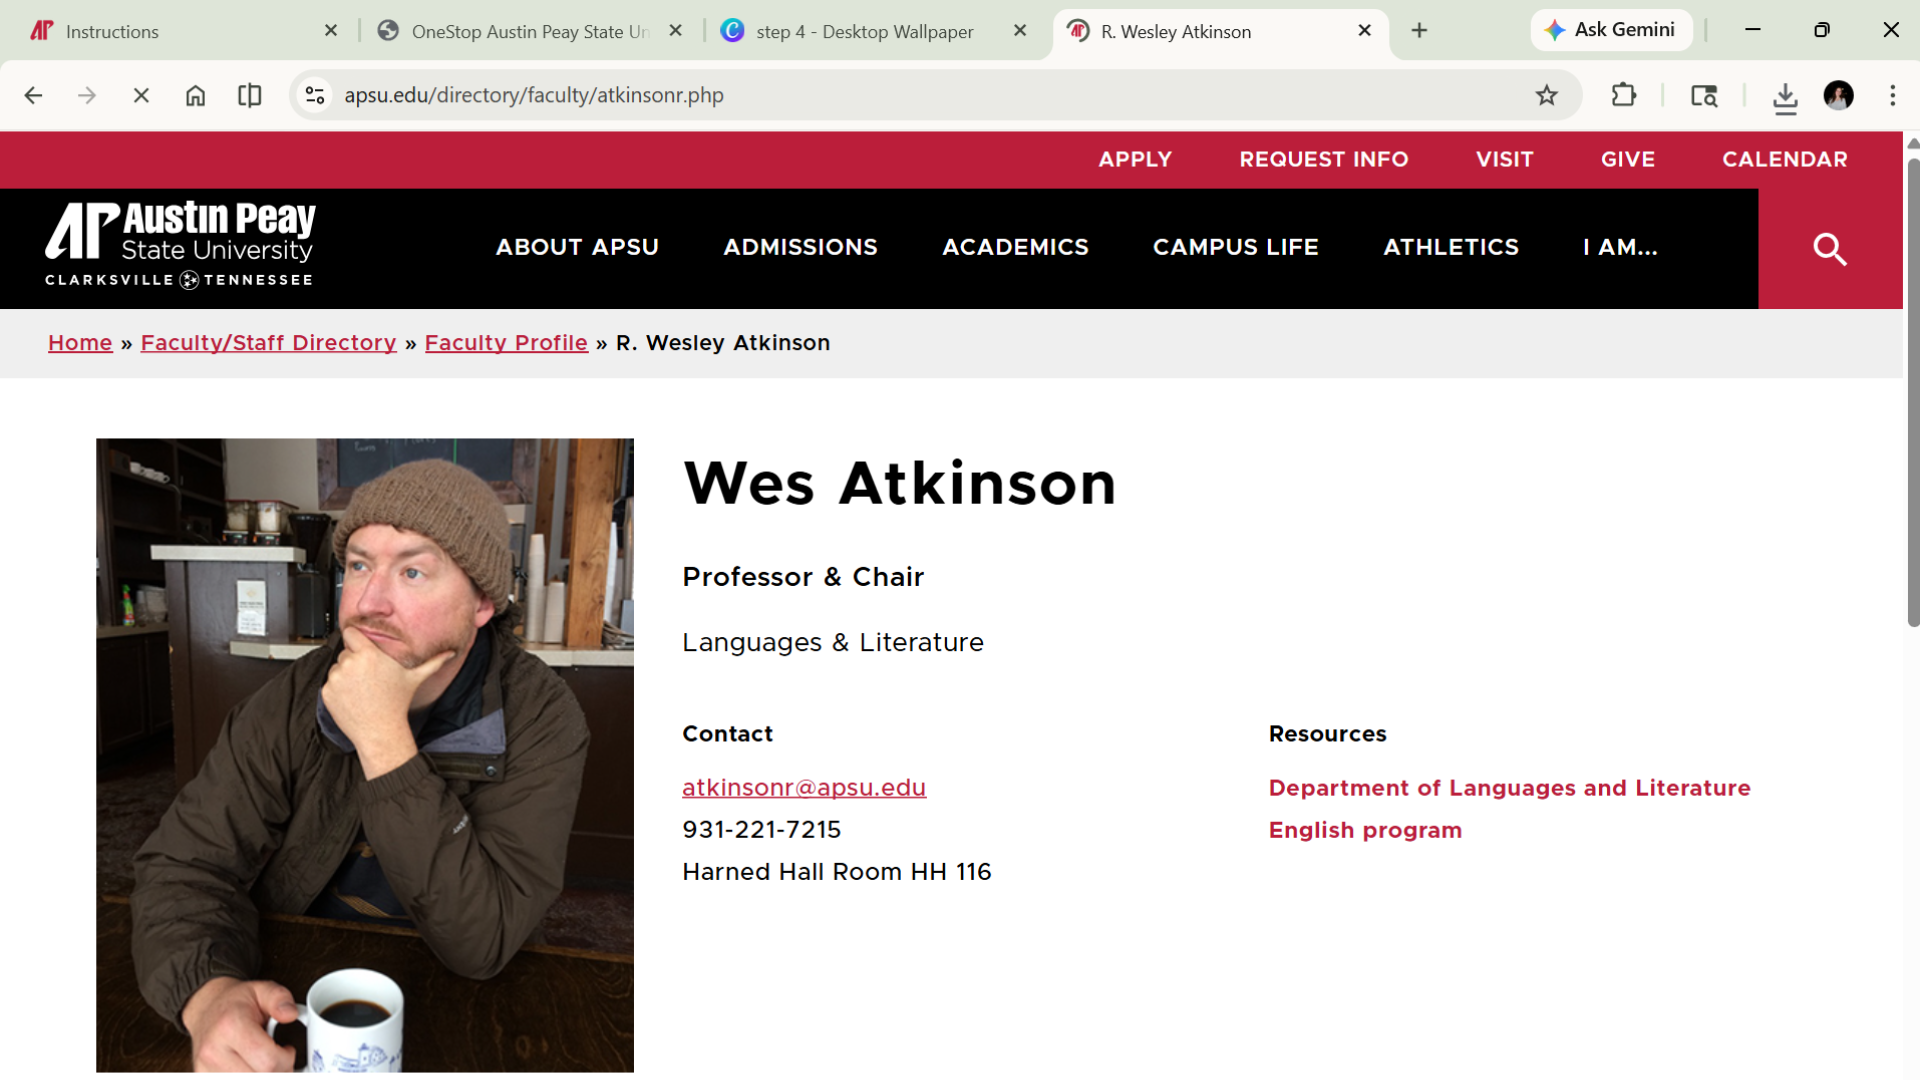
Find the page that lists your assigned advisor. This may include the advisor's name, department, email address, or office location.
05
Write down the advisor's contact information
Save the advisor's email address, phone number, or office information so you can use it for communication or scheduling.
06
Open your APSU email
Go to your APSU student email account so you can send a professional message to your advisor.
07
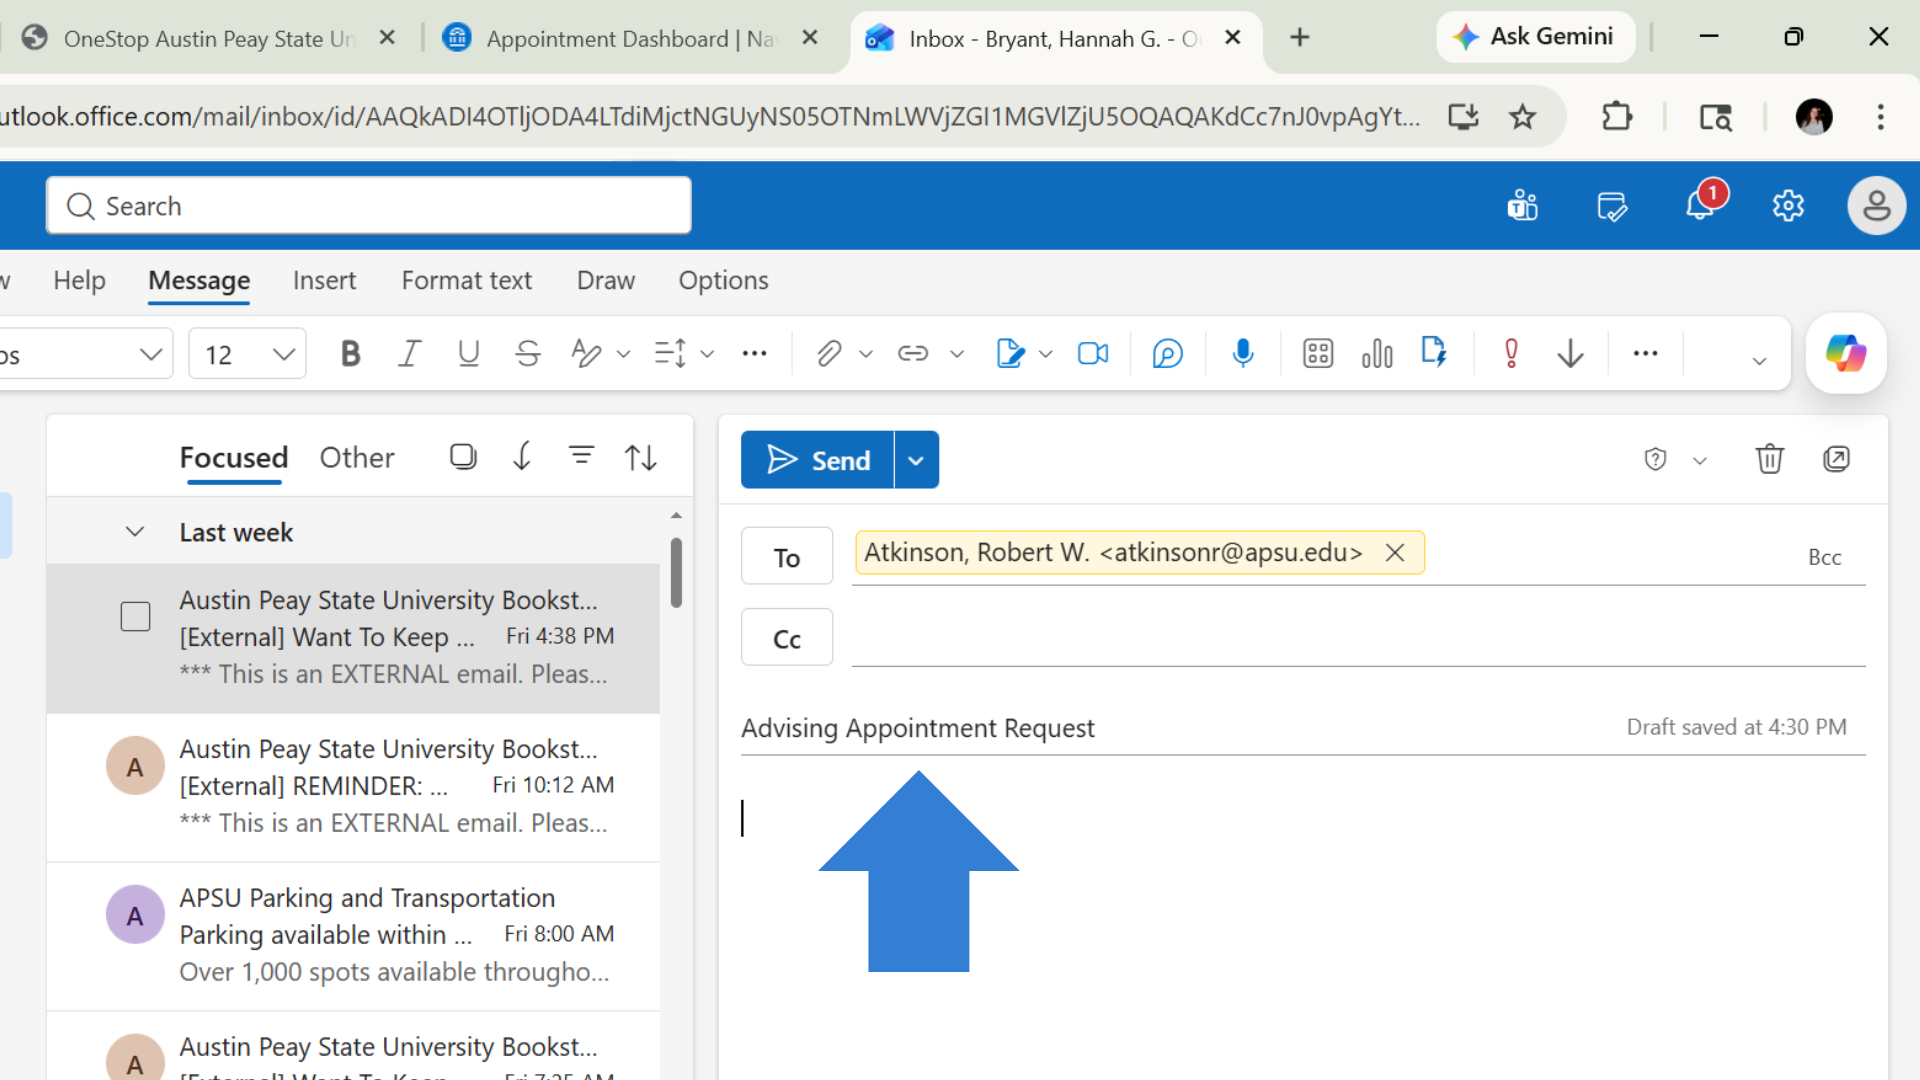
Start a new email message
Click the button to compose a new message. Address it to your advisor using the email you found in the portal.
08
Use a clear email subject line
Type a subject such as "Advising Appointment Request" or "Help with Fall Registration" so your advisor knows why you are contacting them.
09
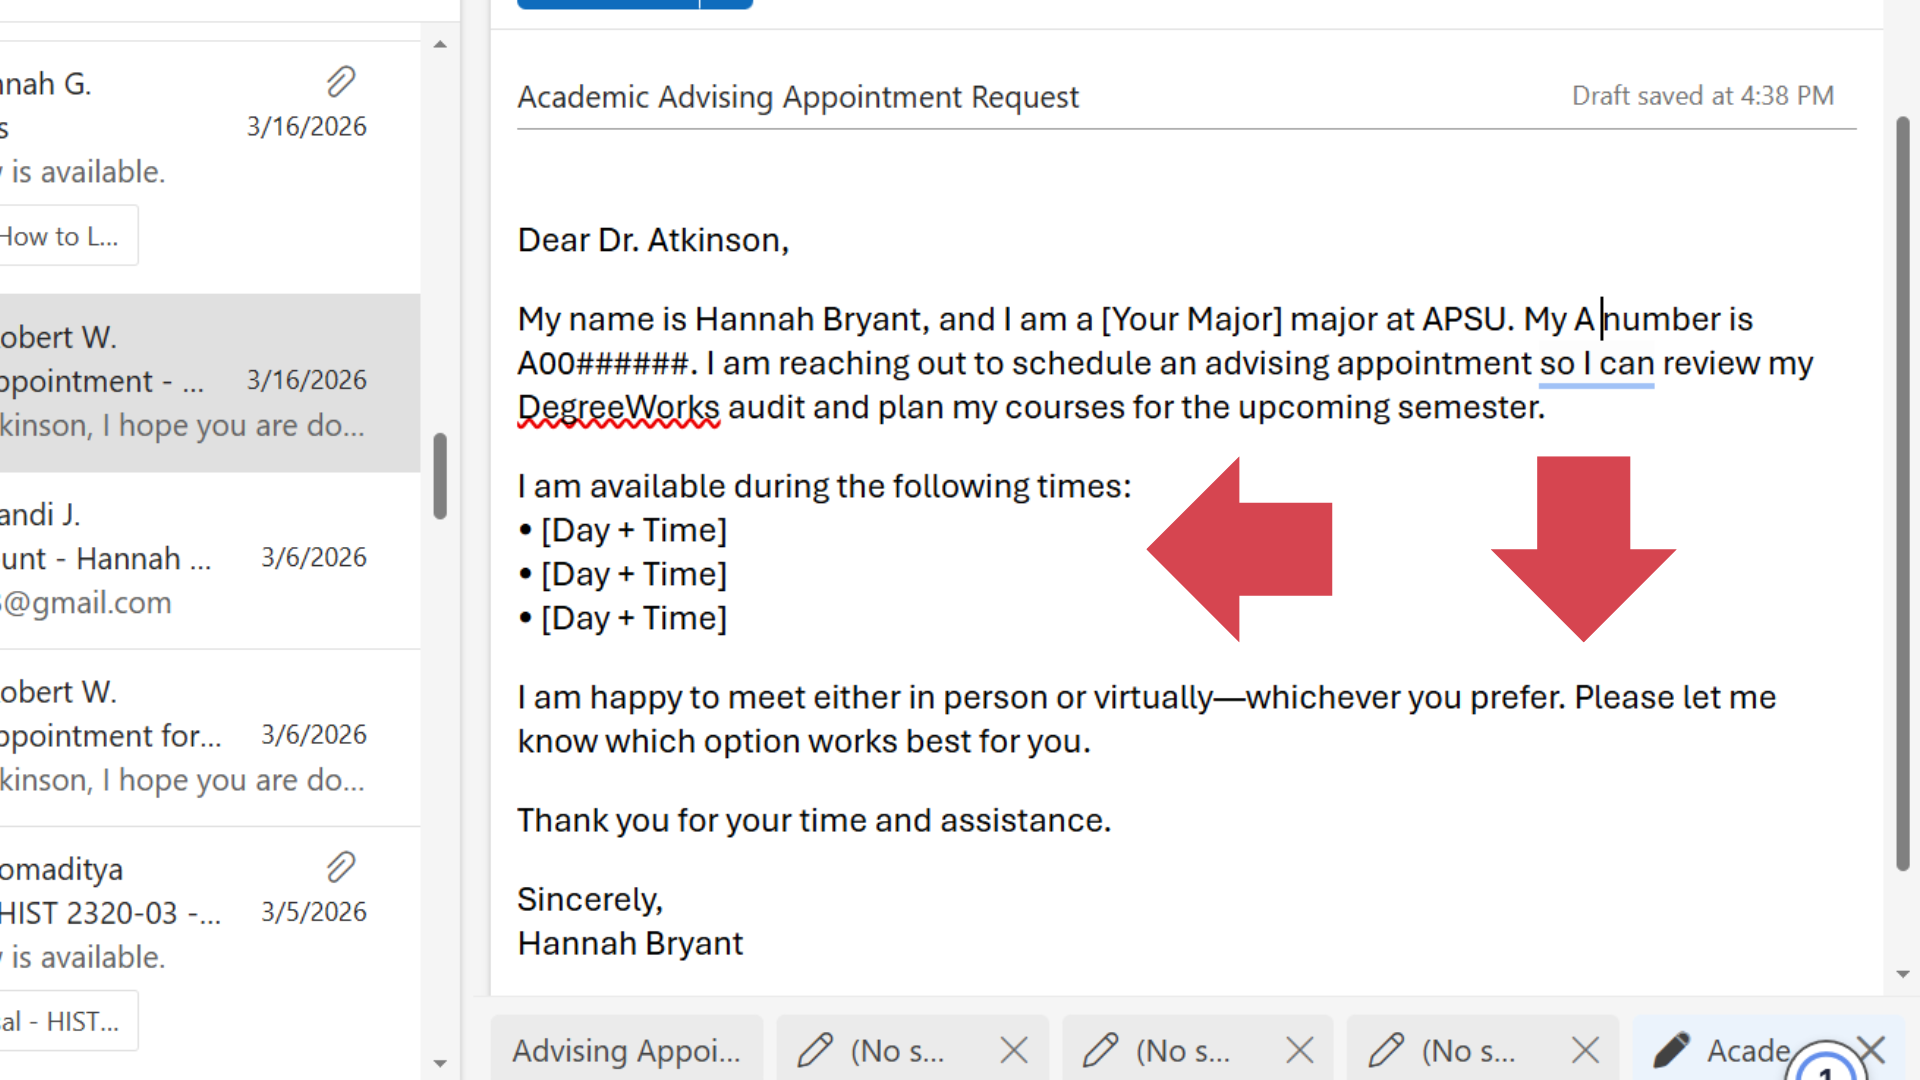
Introduce yourself in the email
Include your full name, student ID, major, and a short message explaining that you want help choosing classes or registering.
10
Ask for an appointment time
Politely request a meeting and give a few times when you are available. If the advisor uses appointment scheduling software, ask for the scheduling link if needed.
11
Send the email and check for a response
Send your message and watch your inbox for a reply from your advisor with instructions, questions, or an appointment confirmation.
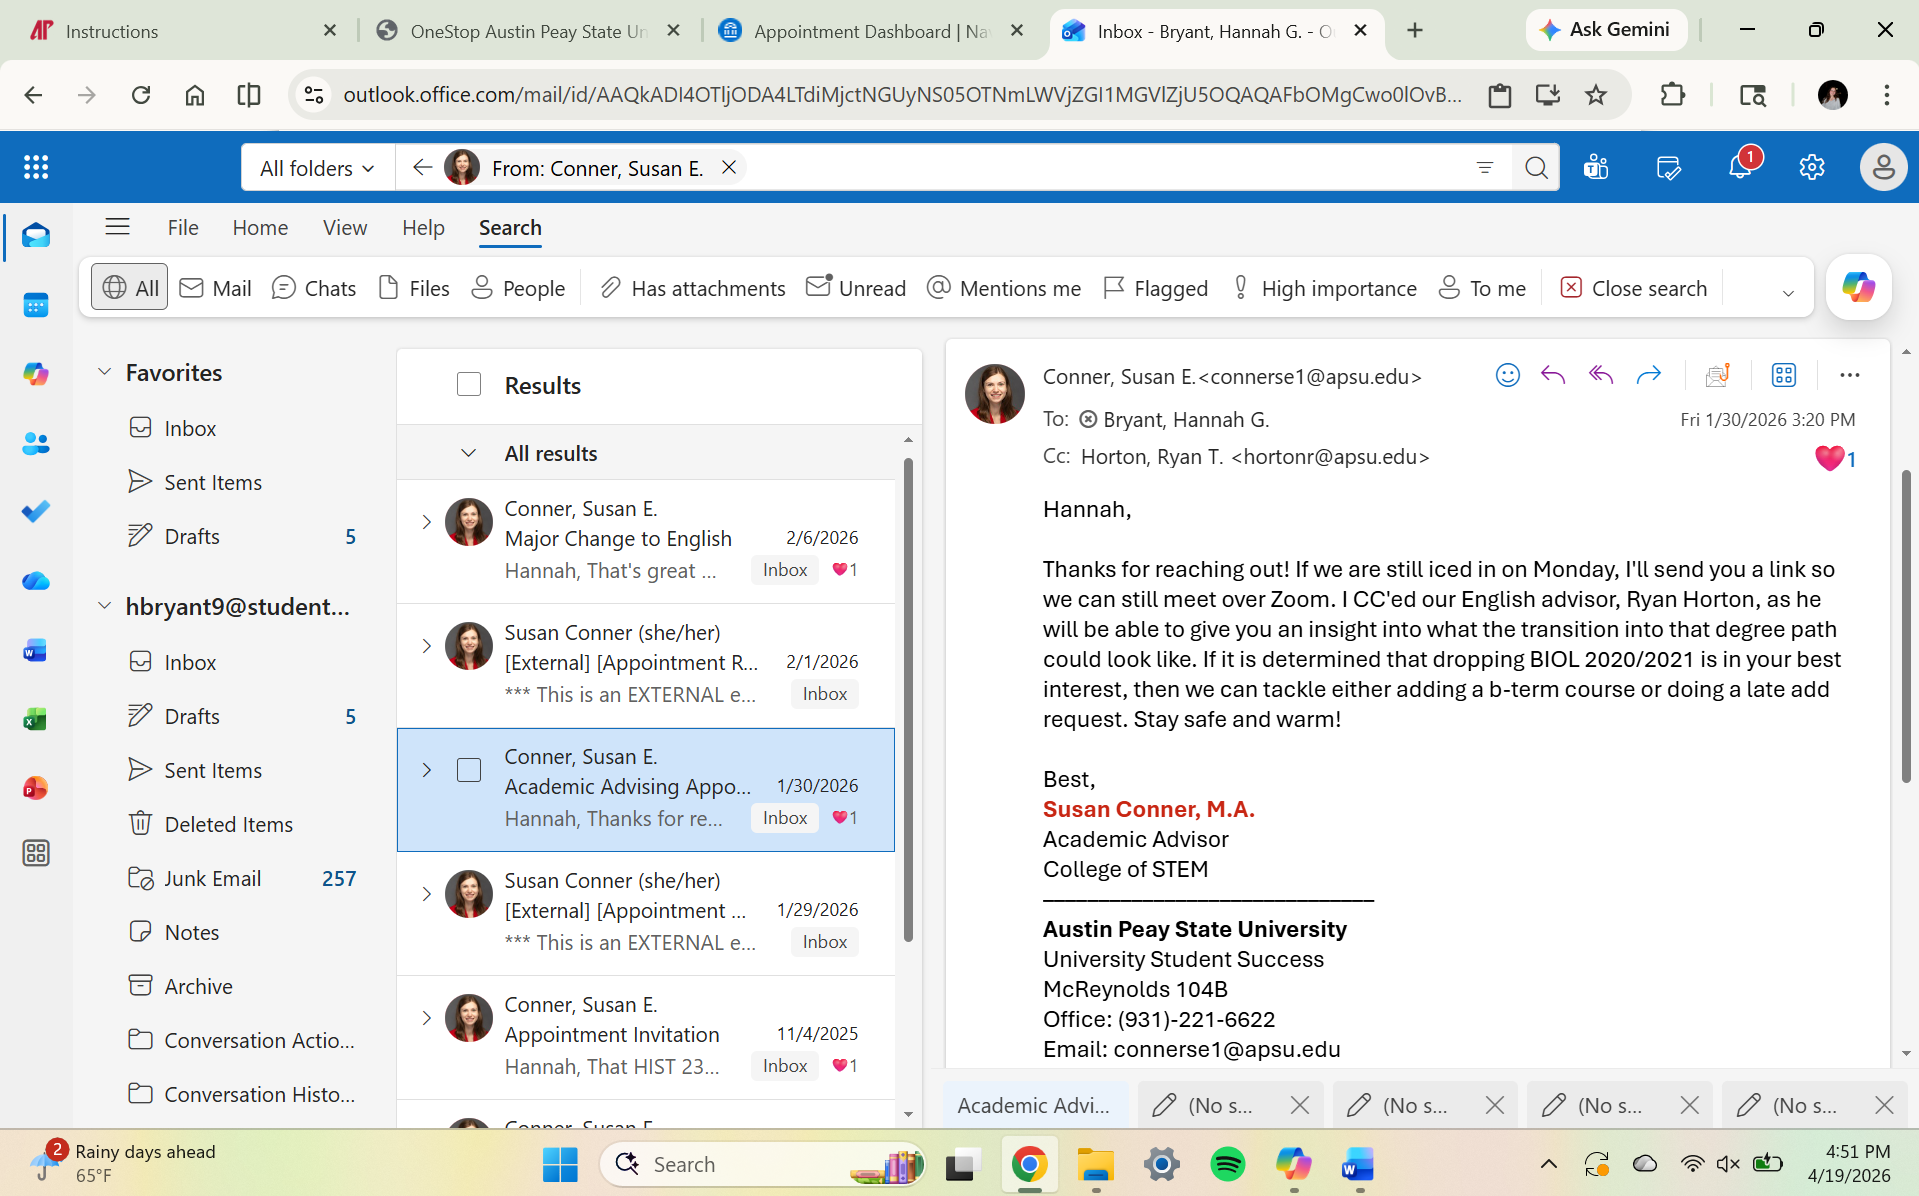
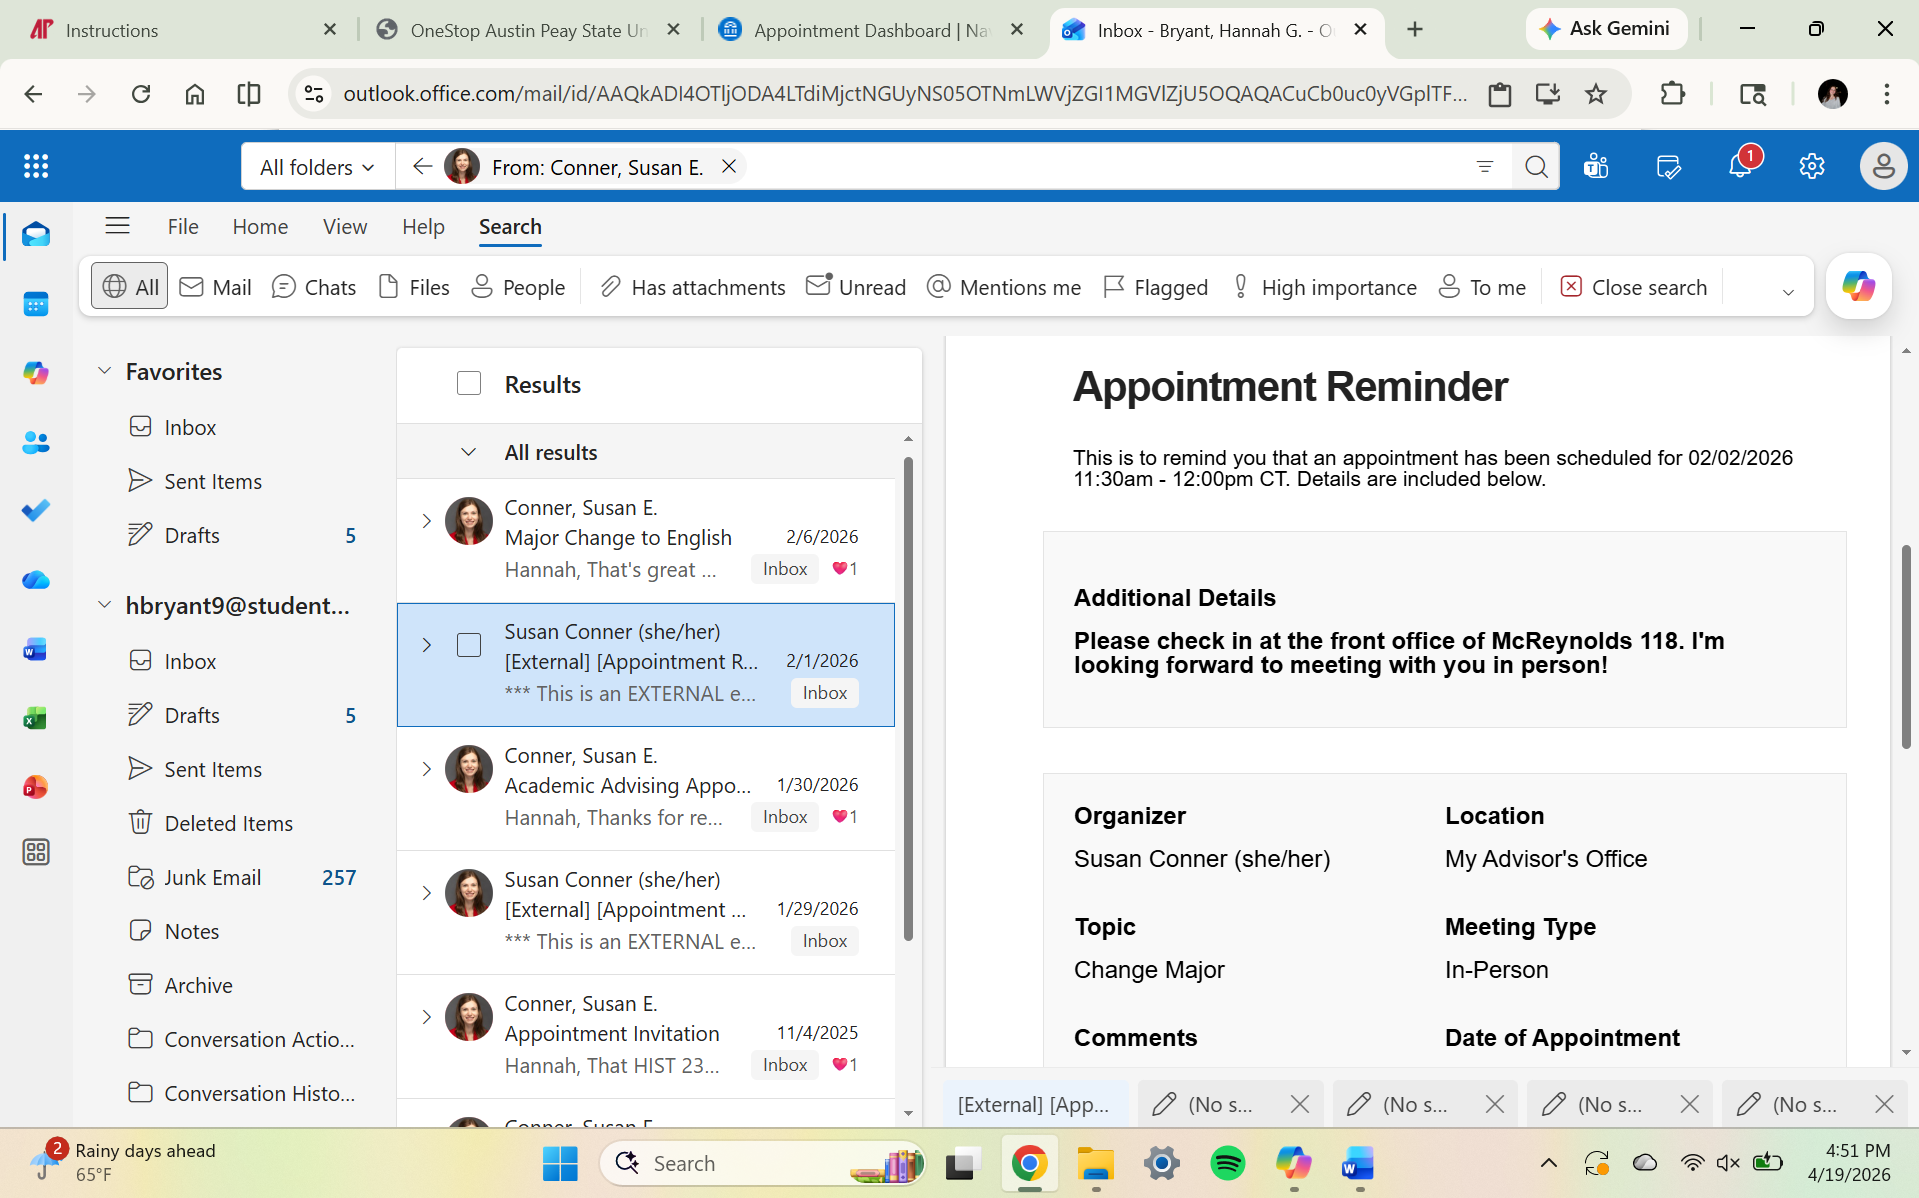
12
Attend the advising appointment
Meet with your advisor in person, by phone, or online. Discuss required classes, electives, holds, and the courses you should take next.
13
Return to the registration area
After advising, go back to the student portal and open the registration section to begin selecting courses.
14
Check for registration holds
Look for any alerts or holds that could stop you from registering. Resolve them before trying to add classes. When you are registering for classes, the registration site will let you know if any holds are on your account.
15
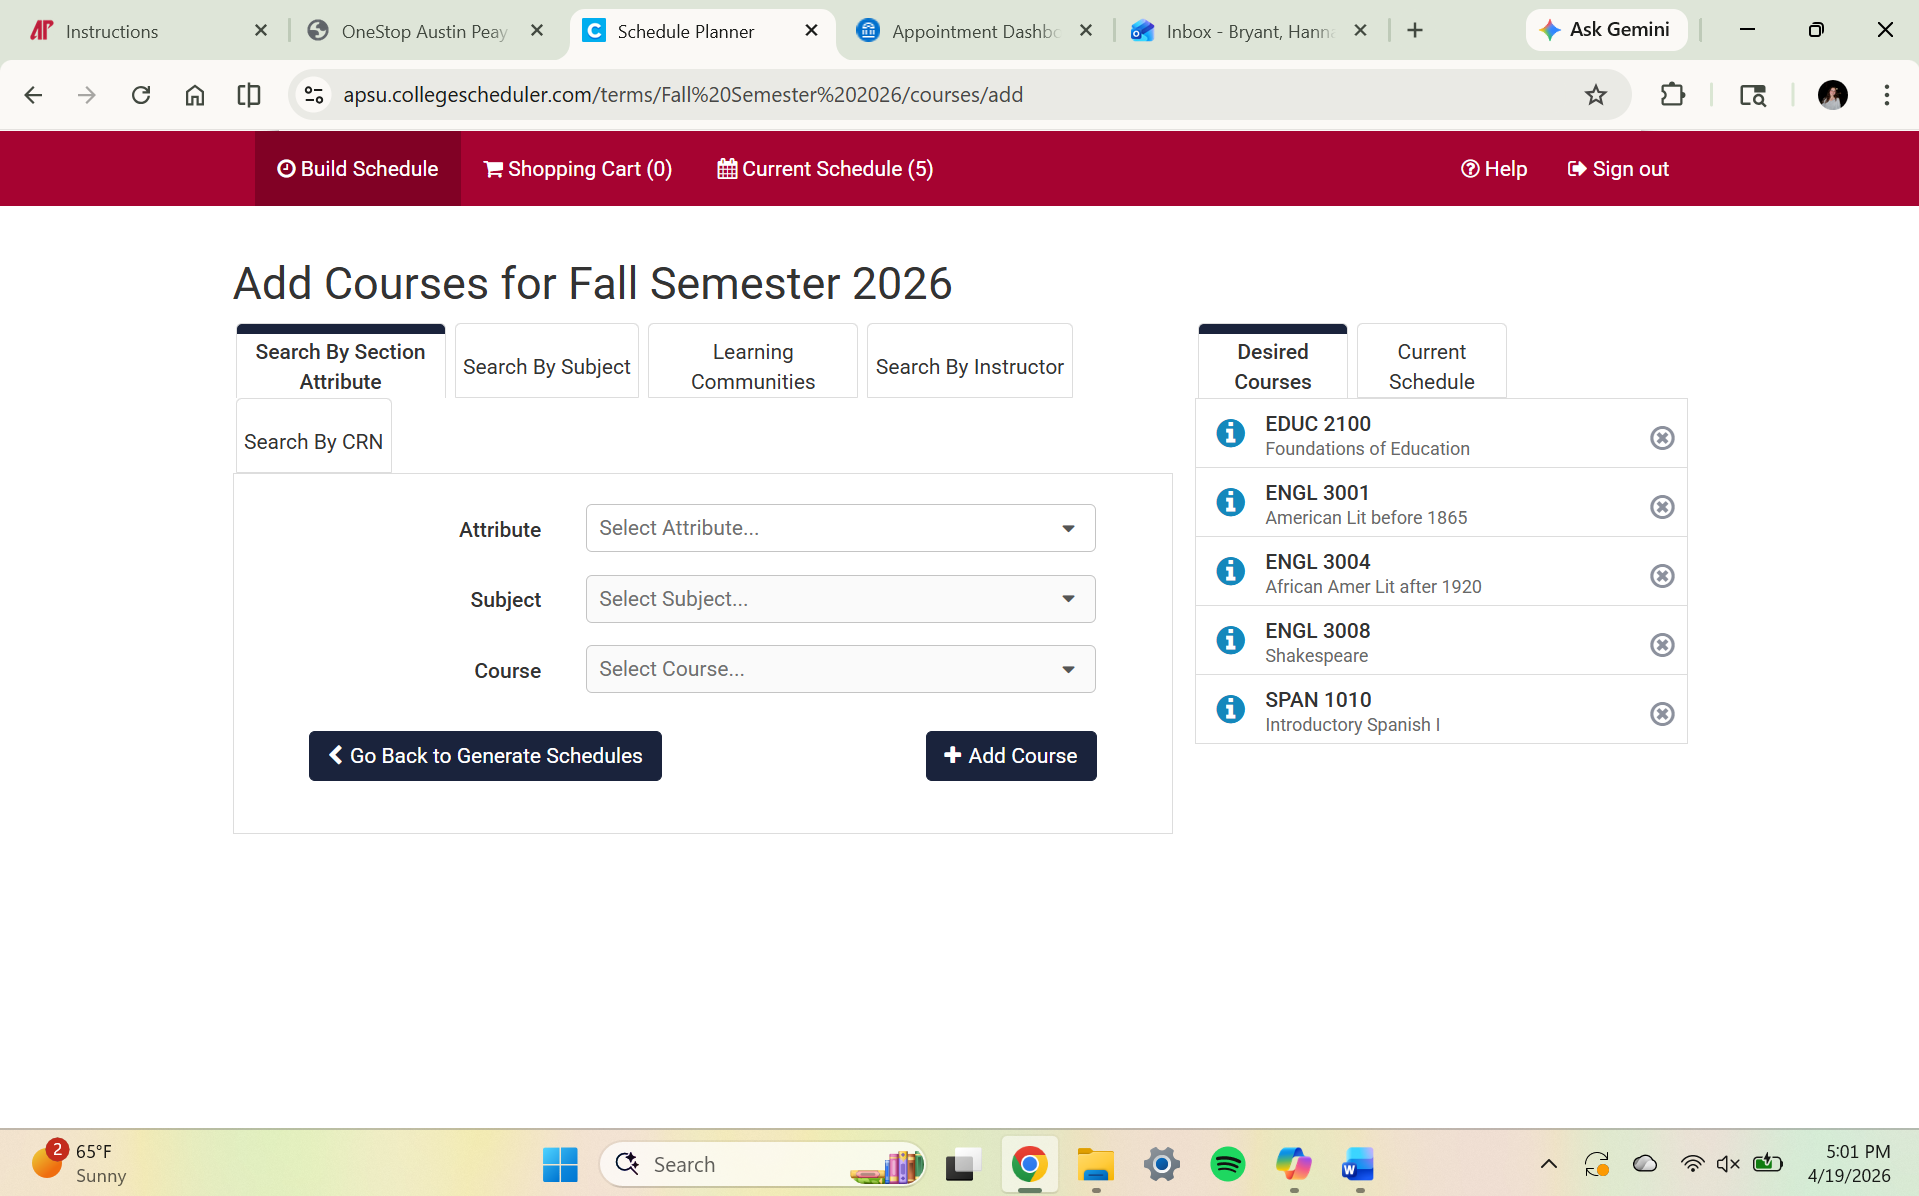
Search for classes
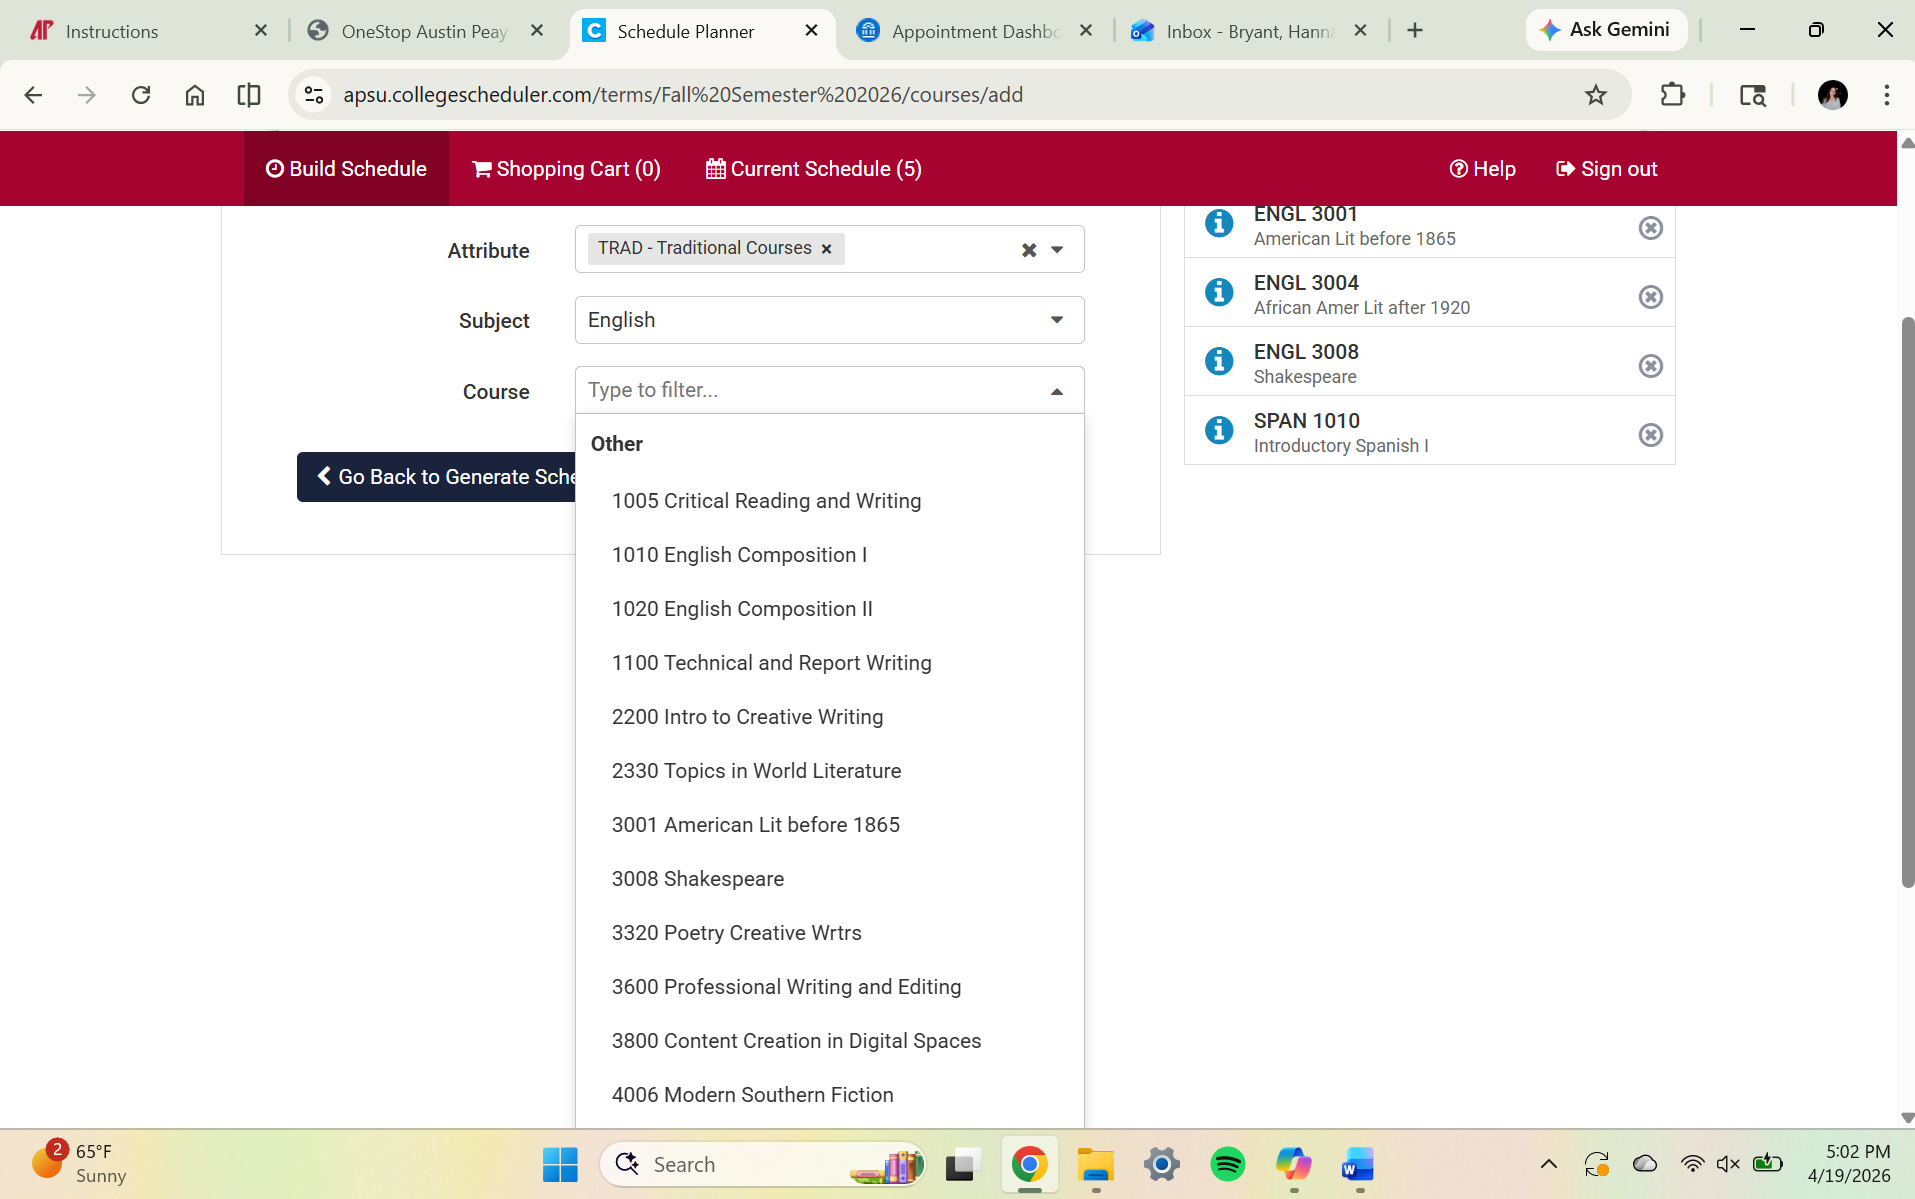
Use the course search tool to find the classes your advisor recommended. Search by subject, course number, or term.
16
Select the sections you need
Review available sections and choose the times, instructors, and course formats that fit your schedule.
17
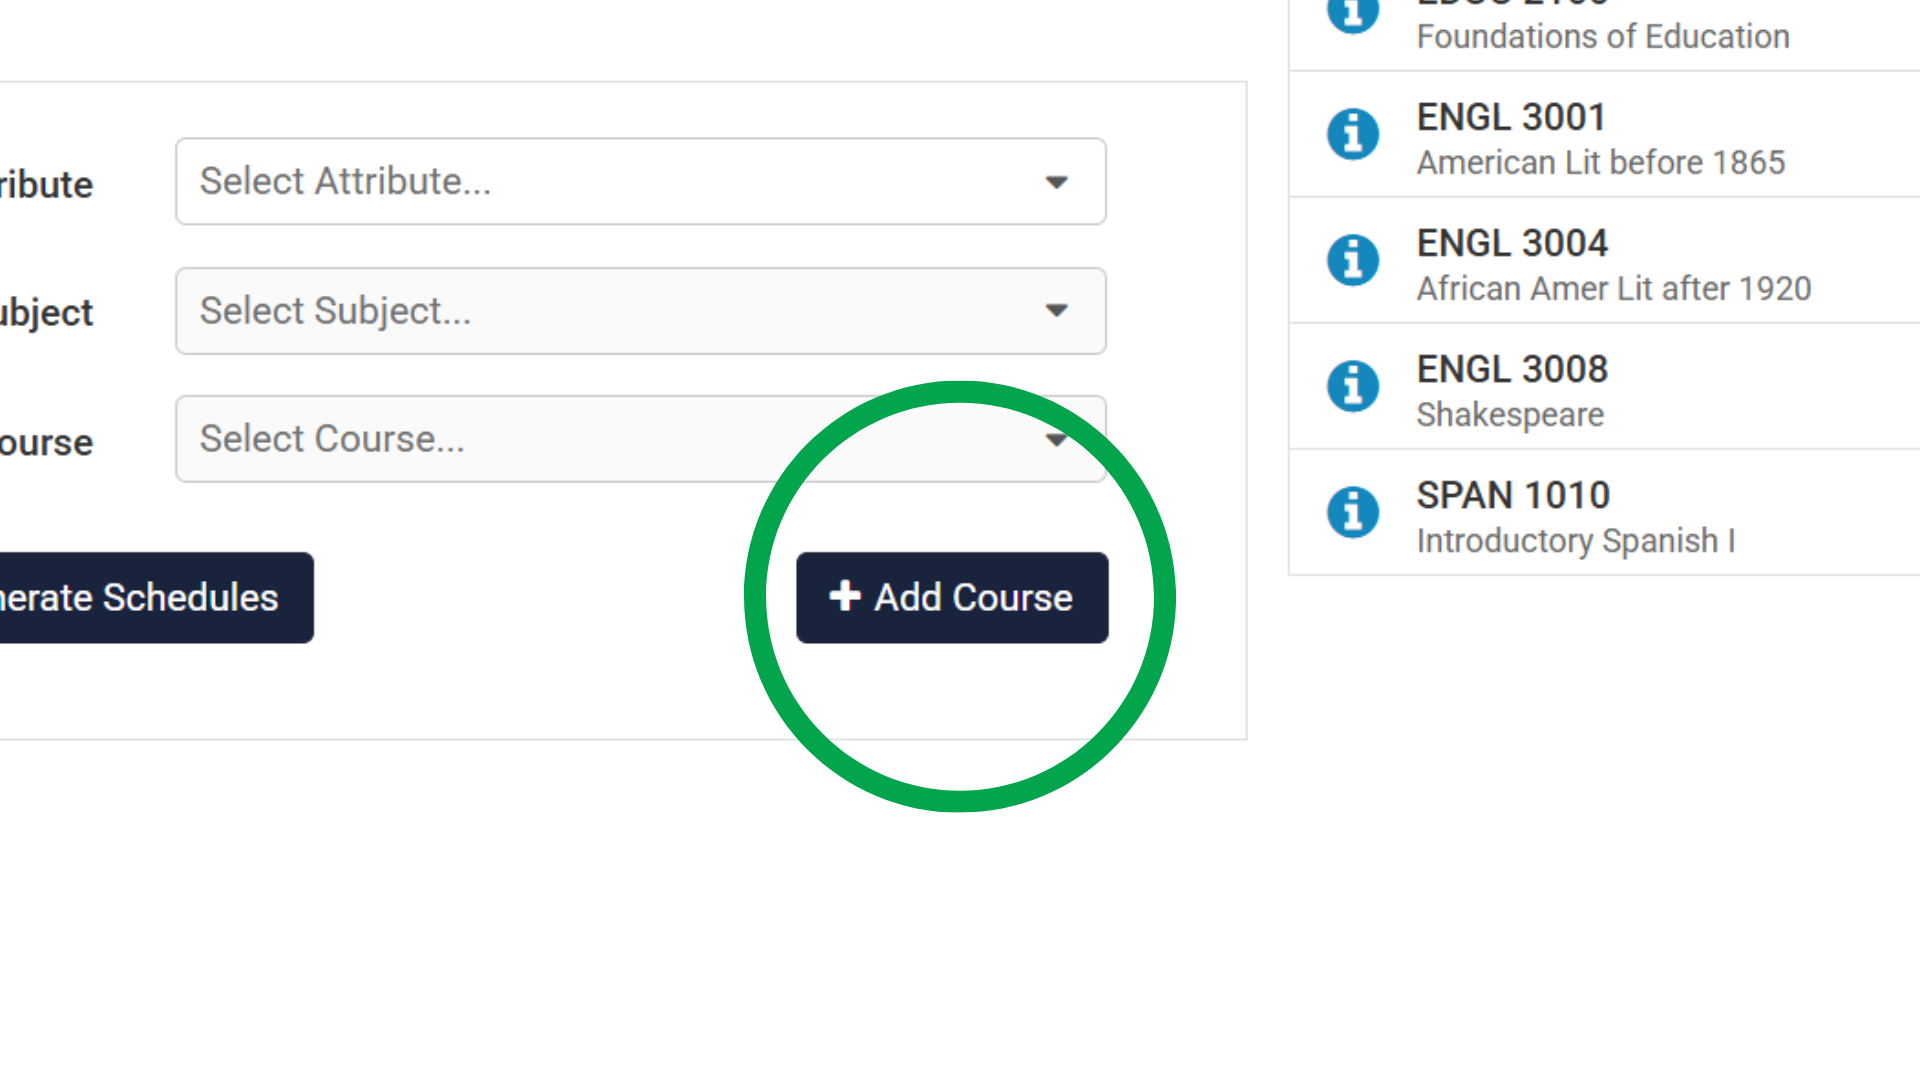
Add classes to your schedule
Click the button to add or register for each course section you want. Repeat this for every class on your plan.
18
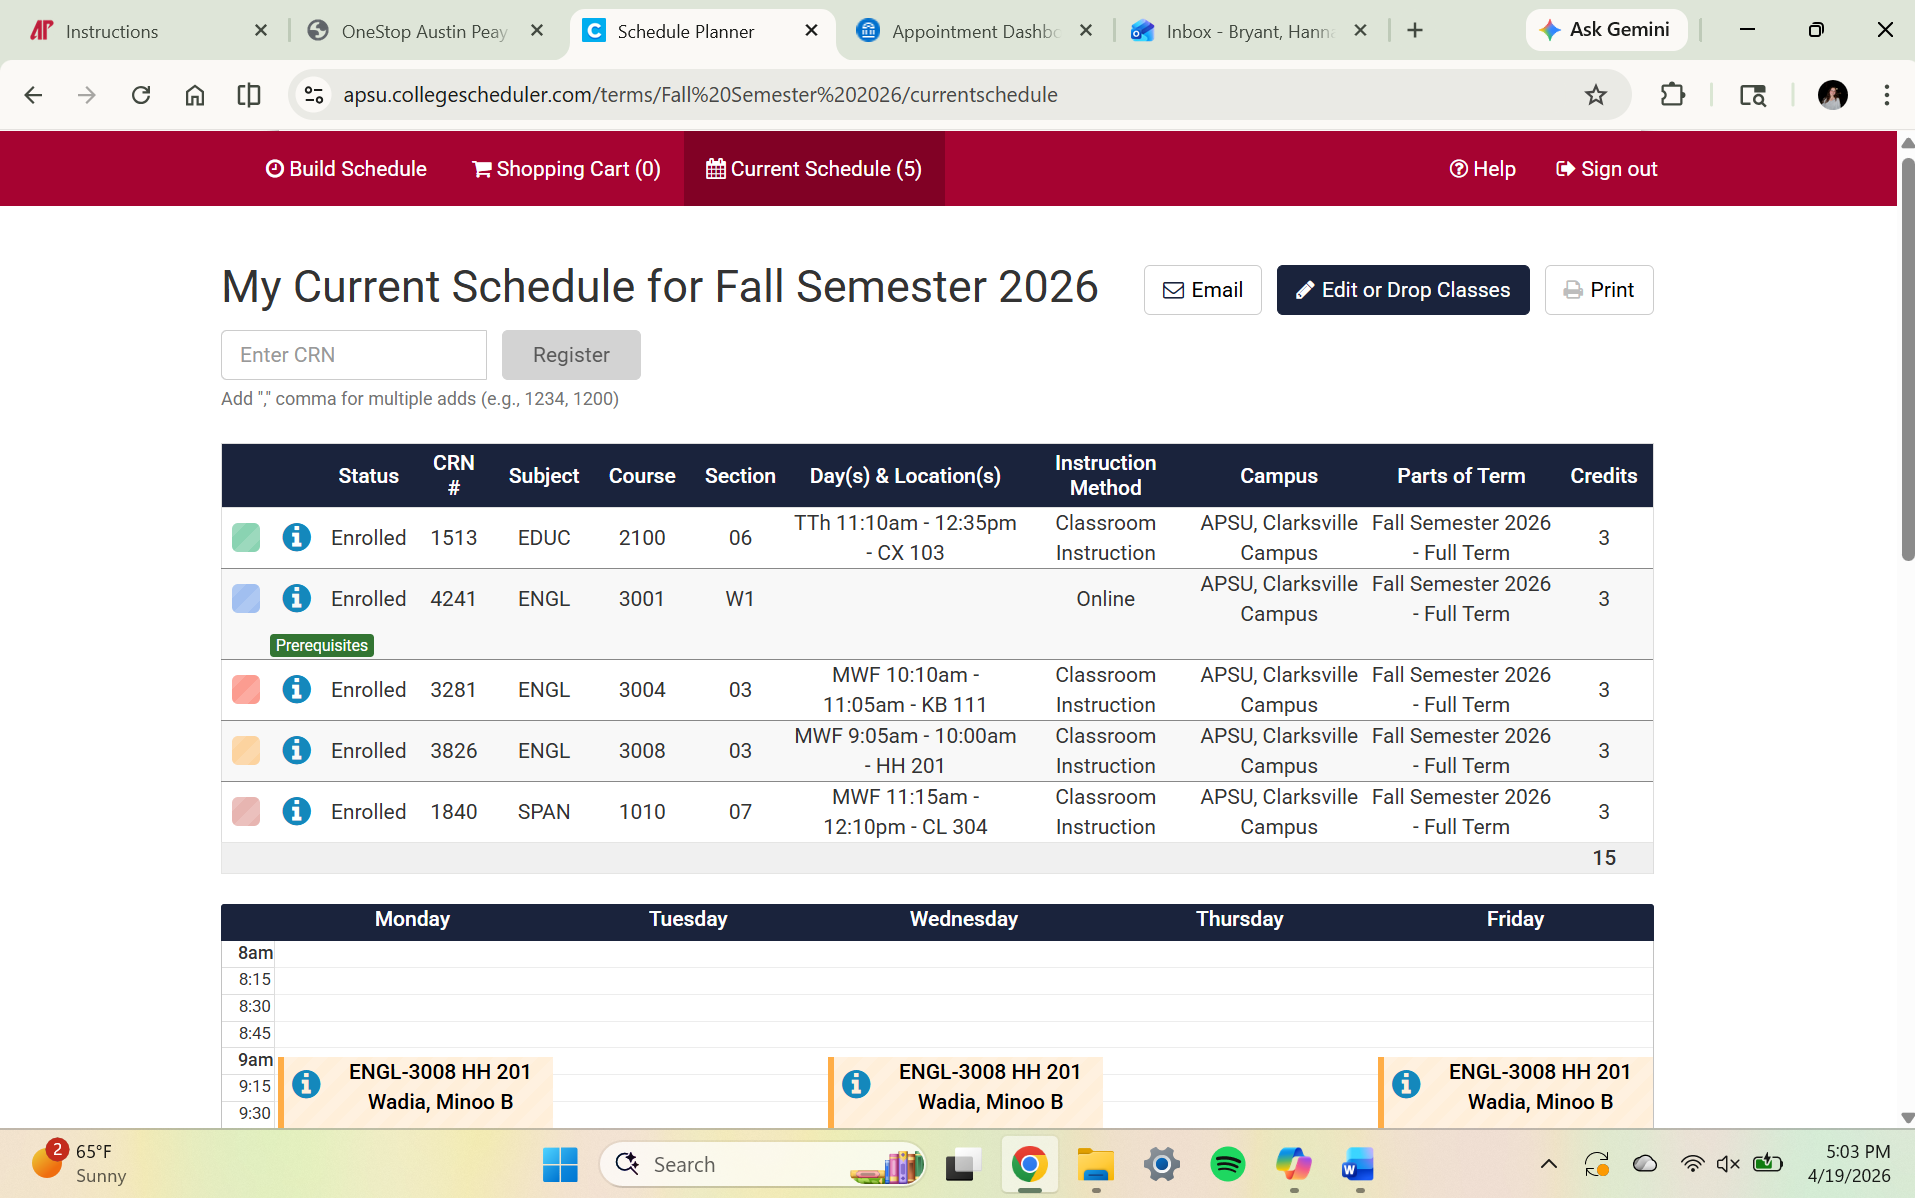
Review your class schedule
Look over your selected classes carefully to make sure the days, times, and course names match what your advisor recommended.
19
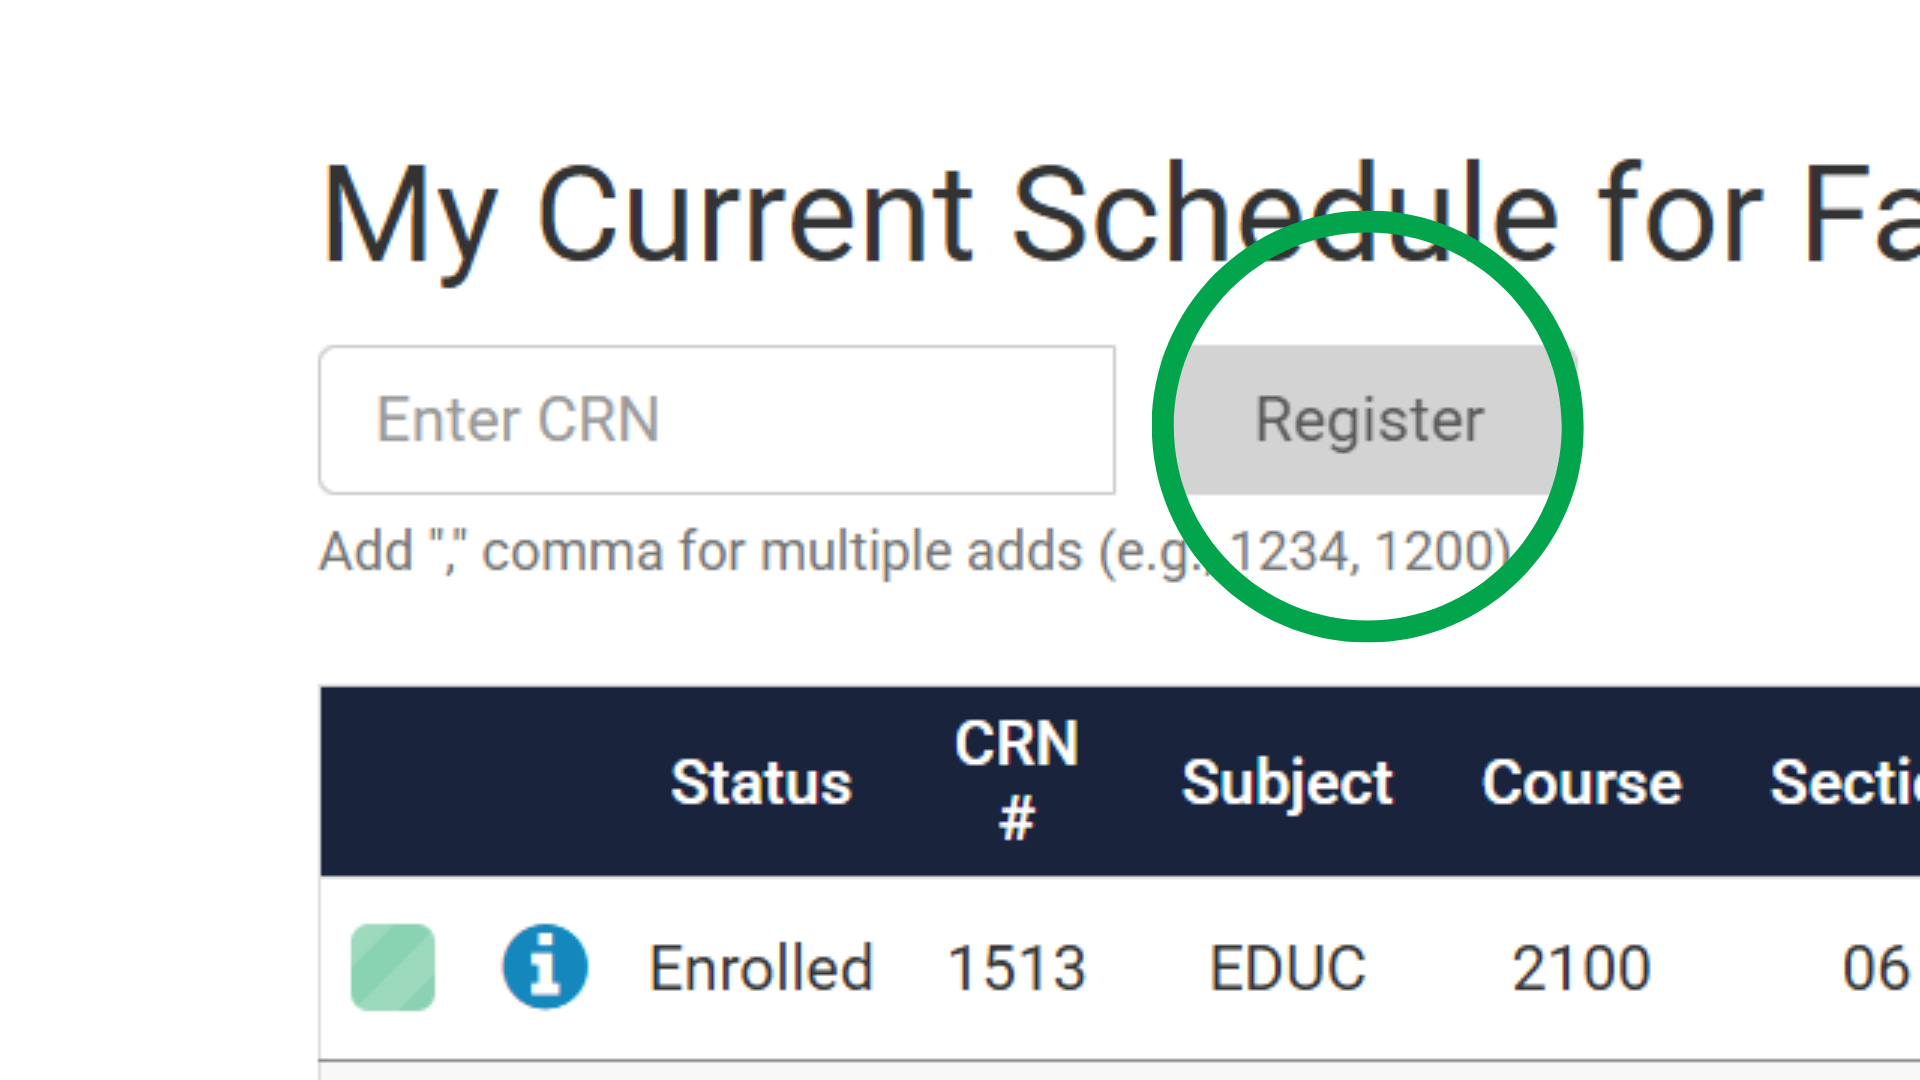
Submit your registration
Click the final submit or register button to officially enroll in your classes for the semester.
20
Confirm that registration was successful
Check for a success message and review your final schedule. Save or screenshot the confirmation for your records.